
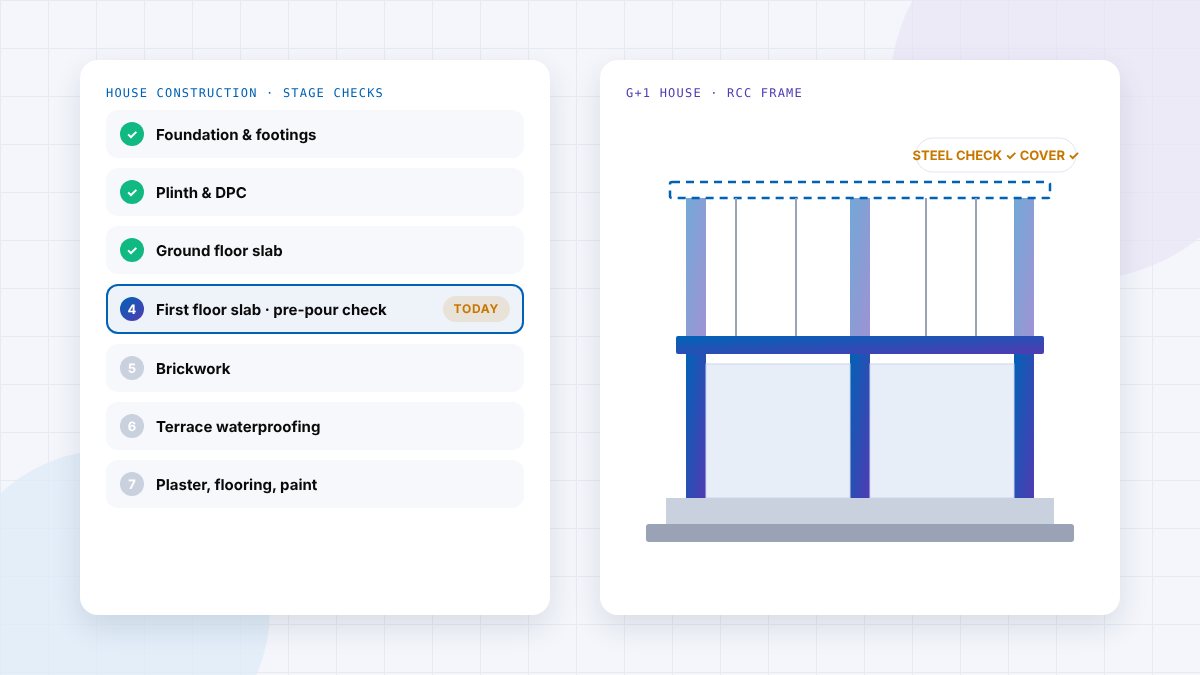
The short answer: The main stages of house construction are: planning and approvals, site preparation and soil testing, foundation, plinth, RCC frame (columns, beams and slabs), brickwork or blockwork, roofing and waterproofing, plumbing and electrical rough-in, plastering, flooring and tiling, doors and windows, painting and finishing, and final handover. Each stage has checks that should be done before the next one starts, because most defects in a finished house were hidden at an earlier stage.
Building a house is usually the biggest purchase a family makes. It is also one of the hardest to check: by the time the walls are painted, the steel in the columns, the slope under the bathroom floor and the waterproofing on the terrace are all out of sight.
This guide walks through each stage of house construction in the order it usually happens, with what is done, what to check and the mistakes to avoid. It is written for homeowners and small builders, mainly for reinforced concrete (RCC) framed houses common in India.
House construction stages at a glance
| # | Stage | What happens | Key check before moving on |
|---|---|---|---|
| 1 | Planning and approvals | Design, structural drawings, estimate, plan sanction | Approved plan and structural drawings in hand |
| 2 | Site preparation | Clearing, soil test, setting out | Setting out matches the drawing |
| 3 | Excavation and foundation | Digging, PCC bed, footings, column starters | Depth, footing size and reinforcement checked |
| 4 | Plinth | Plinth beam, filling, DPC | Levels and damp-proof course |
| 5 | Superstructure (RCC frame) | Columns, beams, slabs floor by floor | Steel, cover and formwork before every pour |
| 6 | Masonry | Brick or block walls, lintels, sills | Alignment, openings and wall plumb |
| 7 | Roof and waterproofing | Roof slab, terrace waterproofing, slope | Flood test on terrace and wet areas |
| 8 | Plumbing and electrical rough-in | Concealed pipes, conduits, boxes | Pressure test and conduit check before plaster |
| 9 | Plastering | Internal and external plaster | Surface level and curing |
| 10 | Flooring and tiling | Floor base, tiles, wall tiles | Slopes to drains, hollow tiles |
| 11 | Doors, windows and fixtures | Frames, shutters, glazing, fittings | Fit, sealing and hardware |
| 12 | Painting and finishing | Putty, primer, paint, final fittings | Finish quality and cleaning |
| 13 | Handover | Snag list, connections, documents | All snags closed and documents received |
Stage 1: Planning, design and approvals
Most problems that cost money later start here. Get these in place before anyone digs:
- Architectural drawings that show every room, door, window and level.
- Structural drawings from a qualified structural engineer, with foundation, column, beam and slab details and bar bending schedules.
- A realistic estimate and BOQ so you know what each stage should cost.
- Building plan approval from the local authority, following setbacks and FSI rules.
- A written contract with your builder covering scope, specifications, rates, payment stages and timeline.
Stage 2: Site preparation and soil testing
The site is cleared and levelled, and a soil test tells the structural engineer what kind of foundation the ground can support. The building is then set out: its grid lines and corners are marked on the ground from the drawing. A setting-out error here moves the whole house.
Check: measure the setting out against the drawing, including setbacks from the plot boundary.
Stage 3: Excavation and foundation
Trenches or pits are dug to the depth in the structural drawing. A plain cement concrete (PCC) bed is laid, then the reinforced footings and column starters are cast. The type of foundation (isolated footings, combined footings, raft or piles) depends on the soil and the load.
- Check excavation depth and size, footing reinforcement (bar size, spacing, cover blocks) and column starter positions before concreting.
- Avoid concreting in water-filled pits without dewatering, and backfilling before the concrete has gained strength.
Stage 4: Plinth
The plinth beam ties the columns together at ground level. The space inside is filled and compacted in layers, and a damp-proof course (DPC) stops ground moisture rising into the walls.
Check: plinth level against the drawing (and road level), compaction of filling, and that the DPC is continuous.
Stage 5: Superstructure: columns, beams and slabs
The RCC frame is built floor by floor: columns, then beams and slab. This is the most important stage for safety and the one where checks matter most, because the steel is hidden as soon as the concrete is poured.
Before every pour
- Bar sizes, numbers and spacing match the structural drawing.
- Cover blocks are in place so steel isn't touching the formwork.
- Formwork is level, tight (no gaps for slurry to leak) and properly propped.
- Conduits and sleeves for electrical and plumbing are placed in the slab.
- Concrete grade and mix are as specified, and cubes are taken for testing.
After the pour
Curing keeps concrete moist so it gains strength. IS 456:2000 calls for exposed surfaces to be kept moist for at least seven days with ordinary Portland cement, and at least ten days where mineral admixtures or blended cements are used, or longer in hot, dry weather. Formwork must stay in place long enough: IS 456 gives minimum stripping times such as 7 days for props under slabs spanning up to 4.5 m, and 14 days for spans over 4.5 m, when ordinary Portland cement is used. Follow your structural engineer's instructions.
Stage 6: Brickwork or blockwork
Walls are built with bricks or blocks (red bricks, fly-ash bricks, AAC blocks or concrete blocks). Lintels are cast over doors and windows.
- Check wall alignment and plumb, door and window opening sizes, lintel bearing, and that walls are cured.
- Avoid building walls tight to beams without the gap and filling your engineer specifies, which can cause cracks.
Stage 7: Roof and waterproofing
The top slab is cast, and the terrace, sunken bathrooms, balconies and water tanks are waterproofed. Leaks are among the most common and frustrating defects in new houses, and most come from this stage.
Check: slope towards drains, waterproofing at corners, pipe penetrations and parapet joints, and a flood test (water held on the surface for a period) before any protective screed or tiles go on.
Stage 8: Plumbing and electrical rough-in
Concealed water supply and drainage pipes, electrical conduits, switch boxes and earthing are laid in walls and floors before plastering.
- Check pipe pressure test before closing walls, drainage slopes, conduit routes against the electrical layout, and that photos are taken of concealed services for future reference.
- Avoid cutting columns or beams to fit pipes or conduits.
Stage 9: Plastering
Internal walls and ceilings, and then external walls, are plastered. External plaster protects the walls from weather.
Check: wall surfaces are true and plumb, corners are straight, and plaster is cured. Cracks in plaster often come from poor curing, wrong mix or joints between walls and RCC without mesh.
Stage 10: Flooring and tiling
A floor base is laid and tiles, stone or other flooring are fixed. Bathroom and kitchen walls are tiled.
- Check floor levels and slopes towards drains in wet areas, joints, and tap tiles for a hollow sound that indicates poor bedding.
Stages 11–12: Doors, windows, painting and finishing
Door and window frames and shutters are installed, followed by wall putty, primer and paint, then electrical fittings, sanitary fixtures, kitchen work and final cleaning.
Check: doors and windows open, close and lock smoothly; window joints are sealed against water; fittings work; paint finish is even.
Stage 13: Snagging and handover
- Walk every room with a snag list: cracks, leaks, hollow tiles, paint defects, fittings.
- Test every tap, drain, switch and socket.
- Get the documents: approved plans, structural drawings, completion or occupancy certificate where required, warranties, and photos of concealed services.
- Agree how defects found after moving in will be fixed, and for how long.
How long does each stage take?
Durations depend on house size, design, weather, approvals, labour availability and how quickly decisions are made. As a rough guide for a typical G+1 RCC house, structure (foundation to roof slab) often takes a few months and finishing takes as long or longer. Most delays come not from the work itself but from waiting: for drawings, decisions, materials, labour or payments. Read where construction projects actually lose time.
Linking payments to stages
Many house construction contracts pay by stage: an advance, then foundation, plinth, each slab, masonry, plastering, flooring and finishing, with a final payment at handover. Link each payment to a stage that has been checked, not just reached, and keep a percentage until snags are closed.
Common mistakes when building a house
- Starting without structural drawings from a qualified engineer.
- Changing the design after construction starts.
- Not checking steel before concrete is poured.
- Skipping or shortening curing.
- Covering waterproofing without a flood test.
- No photos of concealed pipes and conduits.
- Paying by date instead of by checked stage.
How to track your house construction remotely
Many owners can't visit the site every day. Ask your builder for a short daily update with photos: what was done, how many workers were on site, what materials arrived and what is planned next. Before key pours, ask for photos of the reinforcement. A daily progress report makes this easy to keep consistent.
Builders who manage several houses at once use construction management software for the same reason. With Brikito, site updates, attendance and photos are captured in chat, Brik AI turns them into daily reports, and the owner or builder can see progress without a site visit. See AI construction management software in India.
Frequently asked questions
What are the stages of house construction?
The usual stages are planning and approvals, site preparation, excavation and foundation, plinth, RCC frame (columns, beams and slabs), brickwork, roof and waterproofing, plumbing and electrical rough-in, plastering, flooring and tiling, doors and windows, painting and finishing, and handover.
Which stage of house construction is the most important?
The structural stages (foundation, columns, beams and slabs) matter most for safety, because the reinforcement is hidden once concrete is poured. Waterproofing is the stage most often responsible for long-term problems such as leaks and dampness.
How long should concrete be cured?
IS 456:2000 calls for exposed concrete surfaces to be kept moist for at least seven days with ordinary Portland cement, and at least ten days with mineral admixtures or blended cements, extended in hot and dry weather.
When can formwork be removed from a slab?
IS 456 gives minimum times for ordinary Portland cement, for example 7 days for props under slabs spanning up to 4.5 m and 14 days for spans over 4.5 m. Your structural engineer may specify different times based on the design, cement and weather.
What should I check before a slab is cast?
Check bar sizes and spacing against the drawing, cover blocks, formwork level and propping, embedded conduits and sleeves, the concrete grade, and that test cubes will be taken.
How can I track house construction if I can't visit the site?
Ask for a consistent daily update with photos covering work done, labour, materials and next steps, and photos of reinforcement before each pour. Construction management apps such as Brikito capture this automatically from site chat.
Check each stage before it disappears
A house is built in layers, and each layer hides the one before it. The best protection for any owner or builder is simple: get the right drawings first, check each stage before the next one covers it, keep photos and records, and pay for stages that have been checked. A well-built house is mostly a well-checked house.